Showing posts with label anna griffin. Show all posts

Saturday, 1 September 2007

Putting it all together

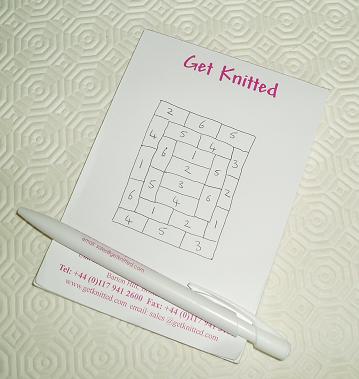
After a lunchtime arrival in up north and a spot of lunch I set up the sewing machine and ironing board and started the work of piecing together the quilt top. I chose Pattern idea 1 and drew out a sketch, numbering each fabric pattern from 1-6.

the plan

I then created corresponding paper labels for the rectangles and laid them out on a table. This does make everything so much easier. It's much more straightforward when you can think to yourself, "now I stitch number 1 to number 2" etc. rather than "now I stitch the snails to the big flowers".

The first step was to stitch together pieces 1, 2, 3 and 4 (pressing each new seam to the side as I went) along their long sides to make the central retangle.
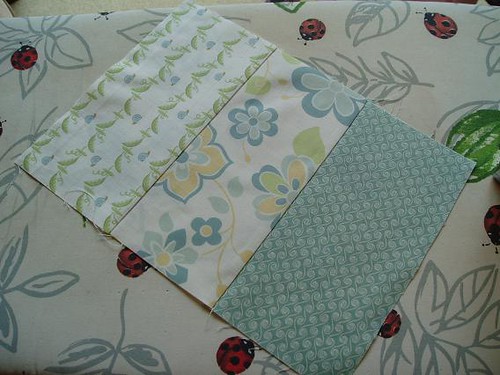
first section

I then tried to see what was the best way to proceed. After calling Mum in to give her expert opinion* we realised that the rest of the quilt pattern consisted of four strips of two rectangles sewn together at their short edge for the inner border and four strips of three rectangles for the outer border and that I then only had to sew straight seams to stitch the strips to the main piece.

first border

It was at this point that I realised I had made rather a blunder in my measuring and cutting out. My rectangles should have been 4.5" by 8.5" (rather than 4 by 9!). Everything was (had I only realised it) salvageable at this point if I had gone ahead but allowing a half inch (rather than a quarter) for seaming every short side. Oh well!

I did, fortunately, realise my error in time to allow a half inch seam when sewing together the four strips of three for the outer edge although it was only when attaching the last two strips to the top and bottom edges of the quilt that I worked out that it would have been better to allow only a quarter inch seam for those two strips so that they would have matched up with the central panel. Sigh!
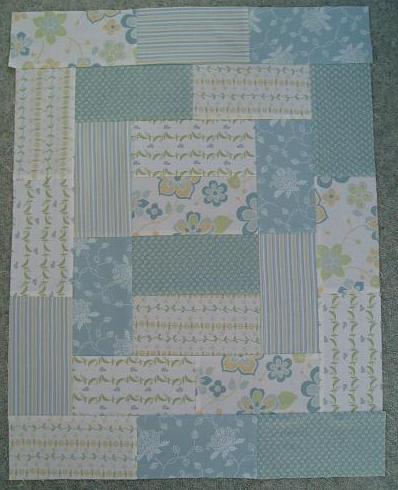
completed quilt top

I'm still really pleased with the finished quilt top (even if it's not quite perfect). The seams are straight, the whole piece lies flat, I haven't made any blunders arranging the different prints. The whole thing went remarkably smoothly and I'm rather sorry I didn't bring up the rest of the pieces as I suspect I could probably get it finished this weekend. I'd forgotten (with the greatest respect to stitchers) what a swift craft sewing is (with a machine at least) when compared to knitting!

Fabric: Lulu G, H, J, K, L, M by Anna Griffin from The Quilt Room
Thread: Gutermann Col. 818
Dimensions: 24" x 32"

* She doesn't sew much now but in the past she's made everything from curtains to a ball gown!
Cutting out

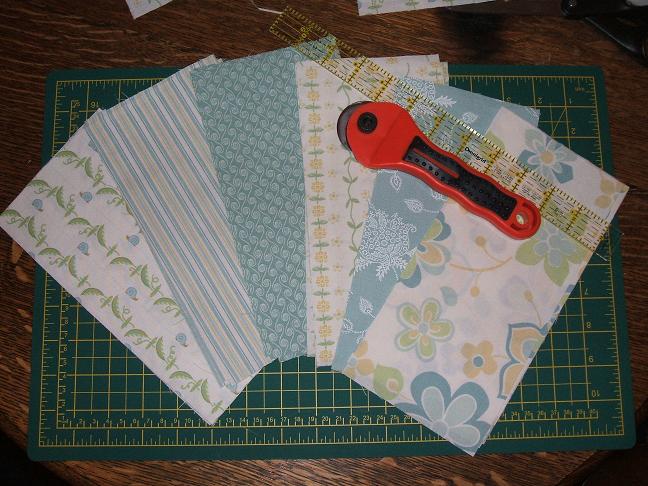
Due to a sudden lack of hot water from the taps (darned immersion heater timer switch) I had decided to pre-wash and cut out the pieces for the quilt top at my parents house where I was headed at the weekend and which is where the sewing machine lives. The realisation that the cutting board wouldn't fit in my suitcase prompted a quick change of plan and I set to work on Thursday evening instead. I hand-washed the pieces in hand hot water and Stergene, spun them to damp and then put then in the dryer* for as long as my nerves would hold out which wasn't very long. I then ironed the pieces dry, which gave them a lovely crisp finish, and set to work with the rotary cutter.

I had intended to mark out the cutting lines on the fabric with my fancy new pen with disappearing ink. Sadly, when I took the lid off, the pen tip seemed to have disappeared altogether. Either it's a crappy product or it works in a way too complex for my tiny mind to comprehend (I tried various pushing, popping and twisting actions to try and get it to work). I suspect the former really.

Fortunately cutting out 1 x 2 rectangles is not the most difficult task in the world (at least it shouldn't be). I wanted my rectangles to measure 10cm by 20cm, which had to turn into 4" by 8" as that's what my board and ruler are measured in, plus a 1/4" seam allowance all round. 4" plus 1/4" = 4.5". 4.5" x 2 = 9". So I cut 24 4.5" by 9" rectangles**.

cut pieces

They look lovely and neat don't they?

The rotary cutter worked pretty well, though I think I'll have to invest in a sprauncier model if I go in for much more of this, and the non slip ruler was sufficiently non slippy to make me feel a bit better about spending £6 on it. The cutting board was an unqualified success though, the half-inch squares which are marked on it made the whole job much easier.

* I would never normally do this with fancy fabric, especially when it doesn't come with care instructions, but I was on a tight schedule.

** Can you spot the deliberate mistake here? This is why I dropped maths at GCSE!

Wednesday, 22 August 2007

KTQ (knitter turned quilter)

I'm hiding out over here (away from my knitting blog) in order to make a secret project for my first niece who is due in November. My main craft is knitting but I have done sewing in the past and was really looking for an opportunity to do some again. I wanted whatever I did to be a practical project - I have too many finished cross-stitch projects which are just rolled up in bags because I never got around to framing them - and dress-making seemed a bit scary. I also have a long term aim of being able to make a king size quilt (of the sort that I could never afford to buy) for my bedroom. But first things first.

My First Project

It all started at the Festival of Quilts at the N.E.C. last Saturday. I went with the best of intentions. I would buy only some buttons and beads to jazz up a pair or socks or garnish a sweater.

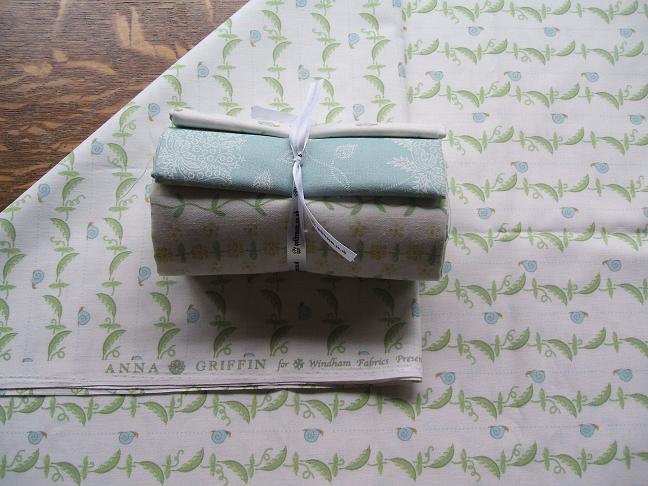
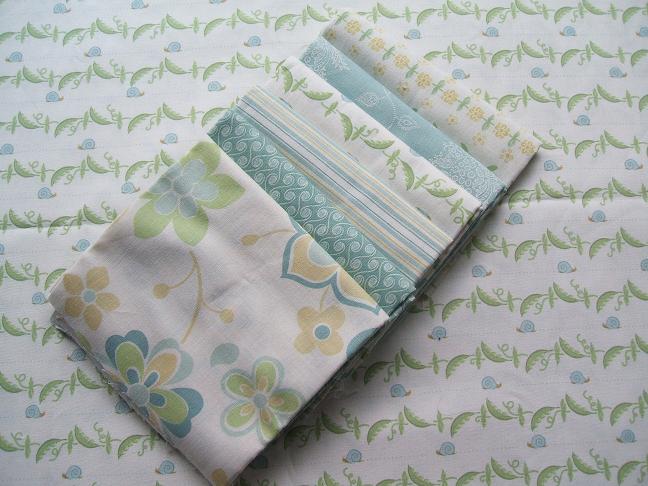
Initially I did very well, indeed I made it to lunch without spending a bean. I resisted the lovely flowery fabrics and the great 3-D cross-stitched cards (I have a dark and murky cross-stitching past). Alas I finally fell over at the Quilt Room and when I got up again I'd somehow acquired a bundle of 6 fat quarters and a metre of snail and pea pod print fabric by Anna Griffin (who does some truly lovely stuff). To be fair I was in good company as Katie also got a metre of the snail fabric and everyone agreed it was just too cute to pass up.

Snail fabric

Fat quarters

It wasn't actually all the amazing quilts that inspired me to have a go myself, rather one or two simple quilts that made me think "I can probably do this". In particular I saw one quilt which would be perfect for a baby and I started to think about quilting, rather than knitting, a baby blanket for my first niece. I wanted to find fabrics which were cute and suitable for a girl but not overly so and the bundle I picked up at the Quilt Room is just perfect I think.

I'm planning to use the 6 fat quarters to create a top piece measuring about 80 x 100 cm using 24 rectangles (something nice and straightforward to start with). The backing will be the incredibly sweet snail and pea fabric. I may then add some appliqued detail on top of that but I don't need to start planning that until I see how the initial quilting goes.

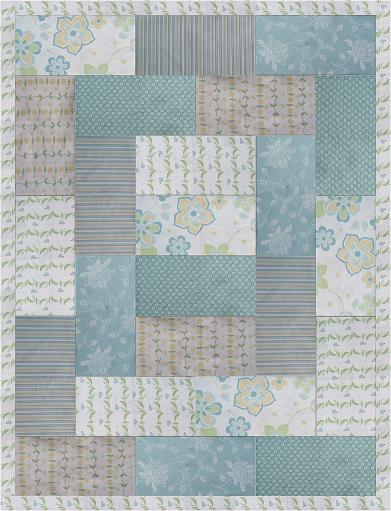
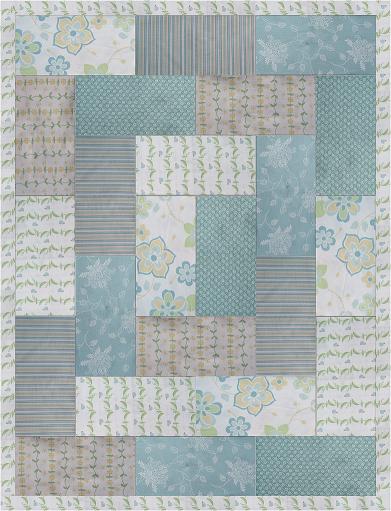
Rather than cut out my pieces and then try to arrange them I decided (being a newbie quilter) to take digital photos of my fabric and then use Paint to cut and paste scale rectangles into patterns.

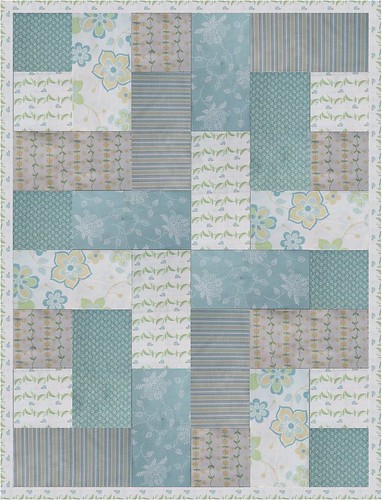
Pattern idea 1:

quilt idea 1

Pattern idea 2:

quilt idea 2

Pattern idea 3:

quilt idea 3

I'm so pleased I did this as I felt so nervous about cutting into my fabric. I know I'll feel a lot more confident if I have a clear plan for my quilt before I start.