Saturday 29 September 2007

Cute as a button

Cupcake buttons

I picked these up in Hobbycraft last week. I haven't decided whether to use them as buttons or whether to make pin badges a la Kirsty. Either way, they're cute as can be. I've also got some (slightly less exciting) buttons for my shirt, they're sewn on and I'll post pictures of the finished item as soon as my official photographer returns. Self-portraits featuring shirts are a good deal more tricky than self-portraits featuring socks it turns out.

Tuesday 25 September 2007

Burda style

Ellen, who is a much more experienced seamstress than I am and who said "You didn't make a muslin? That was brave" in much the same tone as I might say "You didn't knit a gauge swatch?", pointed me to this great site which not only offers free patterns but also sewing "how to's" - which means that for my next project I won't have to wuss out on the sleeves, yes my blouse has turned into a sleeveless one. I'll be taking some pictures of it as soon as I've found the right buttons.

Sunday 23 September 2007

Shirt making 101

After a little difficulty (I really must buy a fabric pencil!) I got my three main pattern pieces marked and cut out on the material. I wasn't really sure how you were meant to mark the places for darts (since I was making this up as I went along) so I cut them out of the pattern and marked round the inside of the cut paper - it seemed rational.

Pattern pieces

I stitched up the front darts but thought it would be cunning plan to pin the three pieces together and see what it looked like before sewing the two back darts which turned out to be a very good idea. Once, pinned on I stopped worrying that it was going to be far too big and started worrying instead that it would be on the small side. The back darts, therefore, will be left unsewn.

Pinned in place

Mum was a great help in all this as she was able to share the secrets of her dress-making past!

Also, very excitingly, the parents suggested that I might like a sewing machine for Christmas* (would I!) so I'll be researching that in the next few weeks. If anyone has any personal recommendations I'd be very interested to hear. The budget is between £100-£200 and I'd be using it for quilting and clothes making.

* this, of course, could just be a cunning ruse to stop me cluttering up their home with sewing stuff every time I come to visit!

Friday 21 September 2007

Not a quilt

flower fabric

I found this in King's (our local fabric place) when I dropped in after work today to see if they had any thimbles*. They don't have a huge selection and this stood out as being a really pretty pattern and 100% cotton (yay).

I have plans for a blouse copied from my favourite polka dot shirt from New Look with possibly a couple of variations - depending on how things go.

I've drawn and cut out paper pattern pieces for the fronts and back and things seem to add up so far but I'm not going to do any more tonight as I'm fairly severely sleep deprived** and I know that disaster would ensue.

I'm headed up north tomorrow so hopefully I can get some machine sewing done over the weekend and I'll have a new shirt by next week!

There's been no further progress on the quilt since my last post on the subject. I haven't found a moment to pre-wash the back and wadding but hopefully I'll have a chance next weekend. I'm also waiting until I see what type of sewing machine we have in Bolton (I really don't remember) so I can suss out a walking foot and decide whether I want to machine or hand quilt the quilt. I think that hand qilting (done well) is prettier, but I have a feeling that my own running stitches will be quite wonky.

* they did but, as a former digitabulist, I'm quite picky and they didn't quite meet my high standards :)

** in fact it's due to waking up at three am this morning with my brain buzzing that I decided to make a blouse at all.

Saturday 1 September 2007

Putting it all together

After a lunchtime arrival in up north and a spot of lunch I set up the sewing machine and ironing board and started the work of piecing together the quilt top. I chose Pattern idea 1 and drew out a sketch, numbering each fabric pattern from 1-6.

the plan

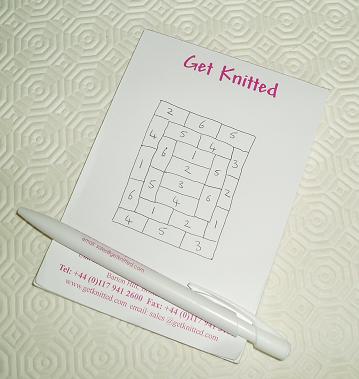
I then created corresponding paper labels for the rectangles and laid them out on a table. This does make everything so much easier. It's much more straightforward when you can think to yourself, "now I stitch number 1 to number 2" etc. rather than "now I stitch the snails to the big flowers".

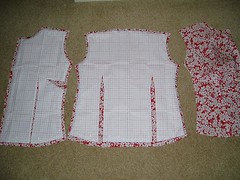
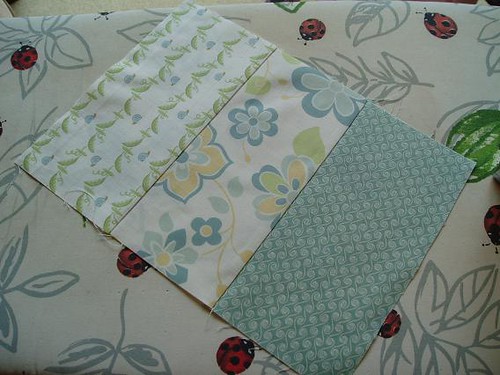
The first step was to stitch together pieces 1, 2, 3 and 4 (pressing each new seam to the side as I went) along their long sides to make the central retangle.

first section

I then tried to see what was the best way to proceed. After calling Mum in to give her expert opinion* we realised that the rest of the quilt pattern consisted of four strips of two rectangles sewn together at their short edge for the inner border and four strips of three rectangles for the outer border and that I then only had to sew straight seams to stitch the strips to the main piece.

first border

It was at this point that I realised I had made rather a blunder in my measuring and cutting out. My rectangles should have been 4.5" by 8.5" (rather than 4 by 9!). Everything was (had I only realised it) salvageable at this point if I had gone ahead but allowing a half inch (rather than a quarter) for seaming every short side. Oh well!

I did, fortunately, realise my error in time to allow a half inch seam when sewing together the four strips of three for the outer edge although it was only when attaching the last two strips to the top and bottom edges of the quilt that I worked out that it would have been better to allow only a quarter inch seam for those two strips so that they would have matched up with the central panel. Sigh!

completed quilt top

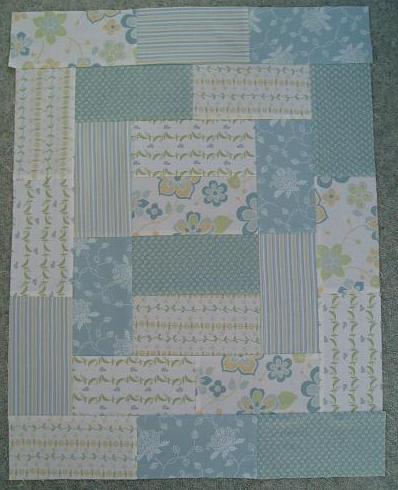
I'm still really pleased with the finished quilt top (even if it's not quite perfect). The seams are straight, the whole piece lies flat, I haven't made any blunders arranging the different prints. The whole thing went remarkably smoothly and I'm rather sorry I didn't bring up the rest of the pieces as I suspect I could probably get it finished this weekend. I'd forgotten (with the greatest respect to stitchers) what a swift craft sewing is (with a machine at least) when compared to knitting!
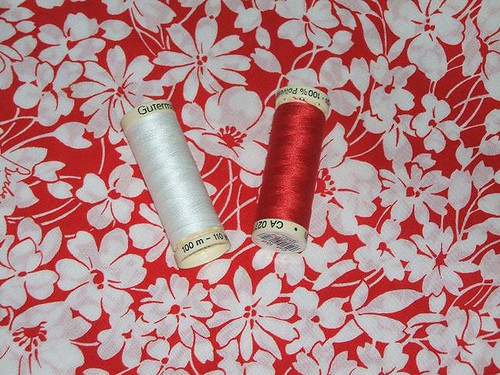
Fabric: Lulu G, H, J, K, L, M by Anna Griffin from The Quilt Room
Thread: Gutermann Col. 818
Dimensions: 24" x 32"

* She doesn't sew much now but in the past she's made everything from curtains to a ball gown!

Cutting out

Due to a sudden lack of hot water from the taps (darned immersion heater timer switch) I had decided to pre-wash and cut out the pieces for the quilt top at my parents house where I was headed at the weekend and which is where the sewing machine lives. The realisation that the cutting board wouldn't fit in my suitcase prompted a quick change of plan and I set to work on Thursday evening instead. I hand-washed the pieces in hand hot water and Stergene, spun them to damp and then put then in the dryer* for as long as my nerves would hold out which wasn't very long. I then ironed the pieces dry, which gave them a lovely crisp finish, and set to work with the rotary cutter.

I had intended to mark out the cutting lines on the fabric with my fancy new pen with disappearing ink. Sadly, when I took the lid off, the pen tip seemed to have disappeared altogether. Either it's a crappy product or it works in a way too complex for my tiny mind to comprehend (I tried various pushing, popping and twisting actions to try and get it to work). I suspect the former really.

Fortunately cutting out 1 x 2 rectangles is not the most difficult task in the world (at least it shouldn't be). I wanted my rectangles to measure 10cm by 20cm, which had to turn into 4" by 8" as that's what my board and ruler are measured in, plus a 1/4" seam allowance all round. 4" plus 1/4" = 4.5". 4.5" x 2 = 9". So I cut 24 4.5" by 9" rectangles**.

cut pieces

They look lovely and neat don't they?

The rotary cutter worked pretty well, though I think I'll have to invest in a sprauncier model if I go in for much more of this, and the non slip ruler was sufficiently non slippy to make me feel a bit better about spending £6 on it. The cutting board was an unqualified success though, the half-inch squares which are marked on it made the whole job much easier.

* I would never normally do this with fancy fabric, especially when it doesn't come with care instructions, but I was on a tight schedule.

** Can you spot the deliberate mistake here? This is why I dropped maths at GCSE!